System Recovery
While, generally speaking, OSDx tries warn about configurations that could leave the system unresponsive or “bricked”, it may come the time where it is necessary to recover the system from one of these unwanted states. This article goes over three escalating ways of recovering a “broken” system.
Default configuration
The first method for restoring the system is to simply return it to a configuration that is known to be good, such as the default configuration.
Before restoring the default configuration, you may want to save your current configuration.
Example:
admin@osdx$ show running | file running://old-config
Command's output saved under "old-config"
Filesize: 372.000 B
Then, run the configuration command load factory-config followed by commit.
Example:
admin@osdx# load factory-config
admin@osdx# commit
admin@osdx# save
Finally, reboot the system. If the issues persist, proceed to the next section.
Factory reset
Factory resetting a device returns it to its original state, both version and configuration.
Warning
This will erase all files and the configuration of the current image.
The factory-reset command allows you to factory reset the device from the OSDx CLI.
Example:
admin@osdx$ factory-reset
This will destroy all data in the current image and restore factory defaults.
Continue? (Yes/No) [No]: yes
Removing current data
Rebooting...
If you have physical access to the device, you can also trigger a factory reset by
pressing the reset button until an LED, usually marked as SYS, starts blinking.
Software recovery
If none of the above methods were successful in recovering the device, a different OSDx version may need to be installed through the bootloader.
Warning
This will erase all files, configurations, and images on the device.
To install OSDx on SDE devices, refer to the Bare metal installation guide. For other devices, continue reading.
Danger
This procedure could leave your device unusable, be extremely careful!
OSDx has a bootloader menu that allows users to factory reset devices, boot into any previously installed image, and reset the device using tftp. The OSDx Boot Menu is only accessible through a serial connection. See Accessing the CLI for more information.
In order to reset the device, you will need to set up a tftp server at IP address
192.168.3.1, with the OSDx image file available at 192.168.3.1/<model>/os.img.
where <model> is the device’s model, for example RS420.
1. Reboot the device
During the boot sequence, you will see the following menu:
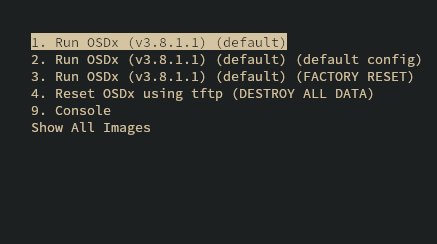
OSDx Boot Menu
At this point you may press the up or down arrow keys on your keyboard to increase the timeout before the device automatically boots.
2. Reset the device
Naviate over to the Reset OSDx device using tftp option and press the Enter
key. This will start downloading the image from the tftp server and installing it on
the device:
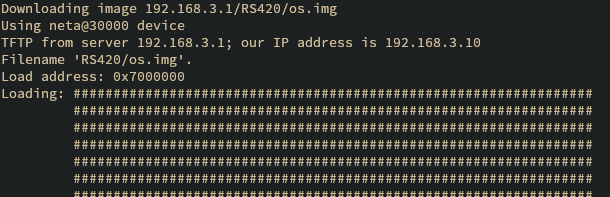
TFTP reset start
If successful, after a couple of minutes you should see the following output:
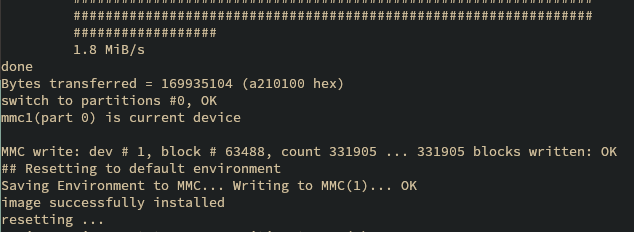
TFTP reset end
The device should then boot into the installed image and the device should be ready.