Bare Metal
Important
This tutorial is only intended for amd64/x86 images.
Currently, there is no support for other architectures.
Introduction
This chapter focuses on how to install and configure OSDx. It also includes a step-by-step guide on how to create and boot from a Live USB flash drive.
Note
A live USB is a USB flash drive or external hard disk drive containing a full operating system that can be booted. You can create your own Live USB using specialized software. With Windows operating systems, we recommend using Rufus, which is a free utility that helps with format and creates bootable USB flash drives. With Ubuntu operating systems, there are many alternatives (e.g., gnome-disks). In this guide we will use both, and the process is almost identical for all tools.
Creating a Live USB on Windows
The first step is to plug in our USB flash drive and open the Rufus tool. Then, we need to select our target device and the OSDx ISO image.
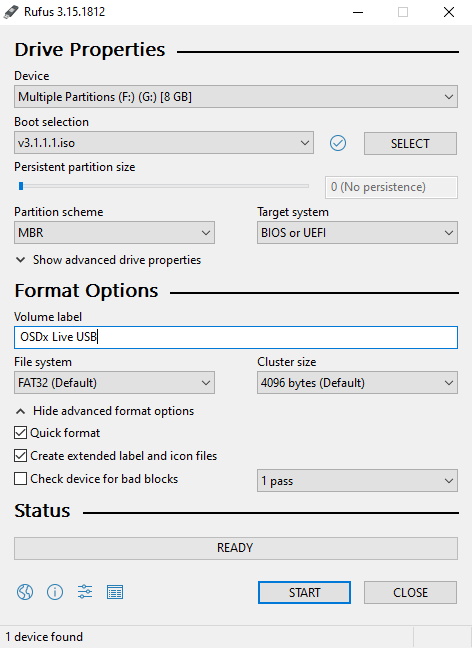
Device and boot selection (Windows 10)
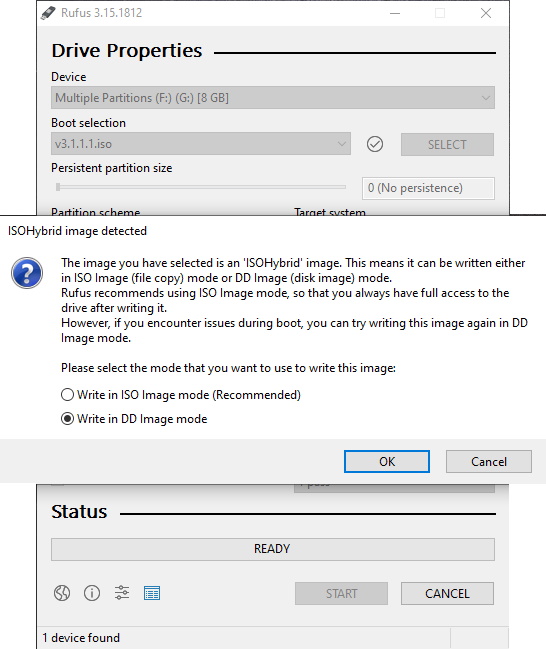
Next, we must click on “Start” and select the “Write in DD Image mode” option.
DD Image mode selection
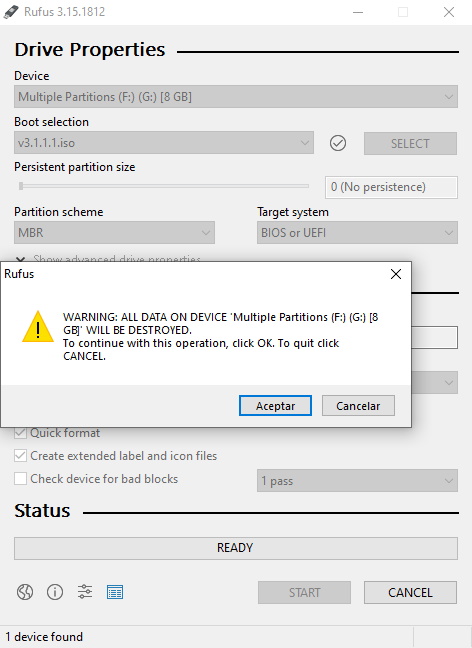
Finally, we must click on “Accept” and wait until the process finishes.
Accepting the writing process
Creating a Live USB on Ubuntu
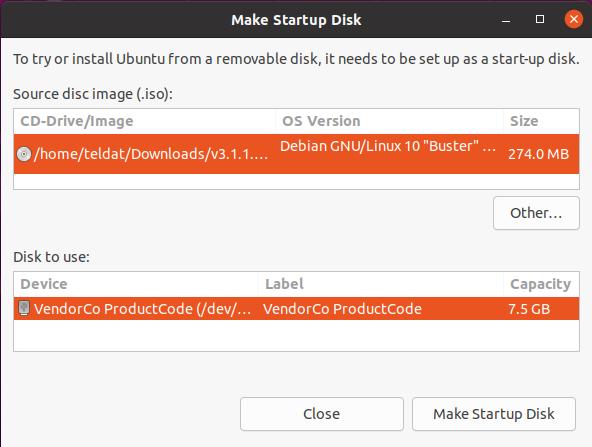
With Ubuntu, we will use the gnome-disks application. Again, we need to plug-in the USB flash drive and launch the application.

Startup Disk Creator (Ubuntu 20.04.3 LTS)
Then, we need to select our ISO image, the USB flash drive, and start the writing process.
Making a startup disk
Once the process has finished, we will be ready to boot OSDx from the Live USB flash drive.
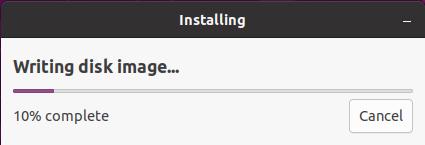
Writing disk image
Booting from a Live USB
Now, we need to ensure we have configured the appropriate boot option priorities in the BIOS Boot Menu. Here, we must select our USB flash drive.
Once the system has turned on, we need to make sure it has booted with the appropriate device. OSDx will automatically boot in 5 seconds if no options are specified.
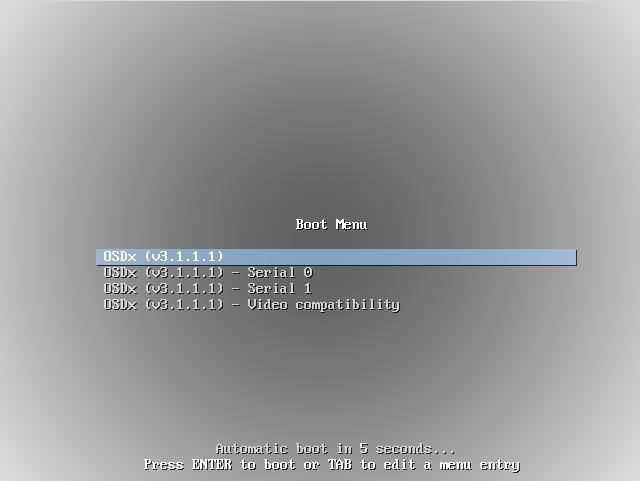
OSDx Boot Menu
After starting OSDx, we must install the image on the hard drive. This process will generate
a universally unique identifier (UUID) that will be used to identify the device against a
license bundle. This means that, every time we install OSDx, a new UUID is generated and the
purchased licenses may stop working. The default login credentials for OSDx is the user admin
and password admin.
Once the login has finished, we have to install the OS. To do this,
use the image install command. We recommend specifying the SDE profile
(image install profile <value> command) to generate a configuration that enables
some minimal services (including dhcp, dns, ntp, etc). Otherwise, the device may not be
accessible.
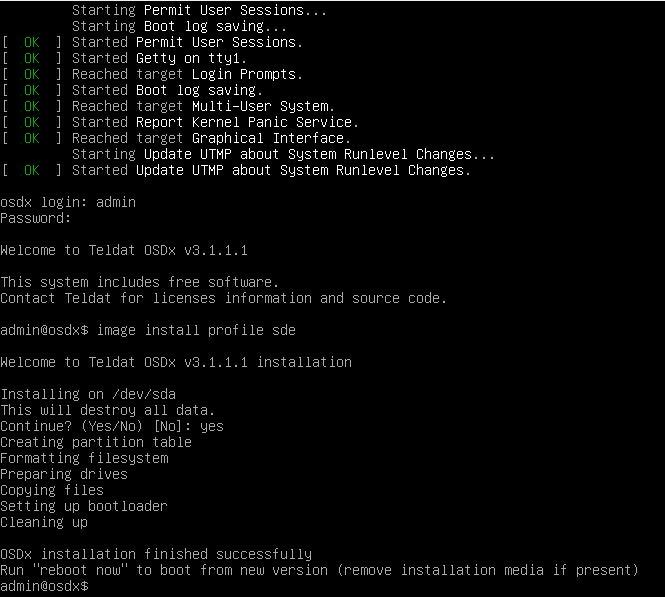
OSDx installation process
After installing OSDx, we have to power off the device (by running poweroff now), unplug the
USB flash drive, and turn the system on again.
If the process was successful, the GNU GRUB menu will appear with the different images installed. We only need to select the appropriate entry or wait 5 seconds to boot with the latest one.
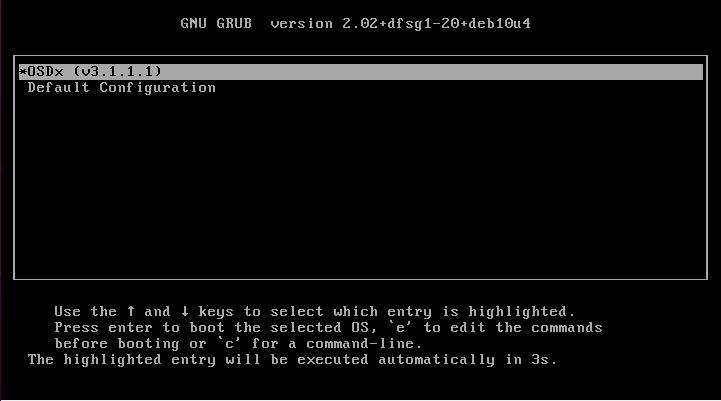
OSDx GRUB menu
show system uuid command
Shows the system’s UUID in a QR Code that can be scanned using QR Reader software.
Example:
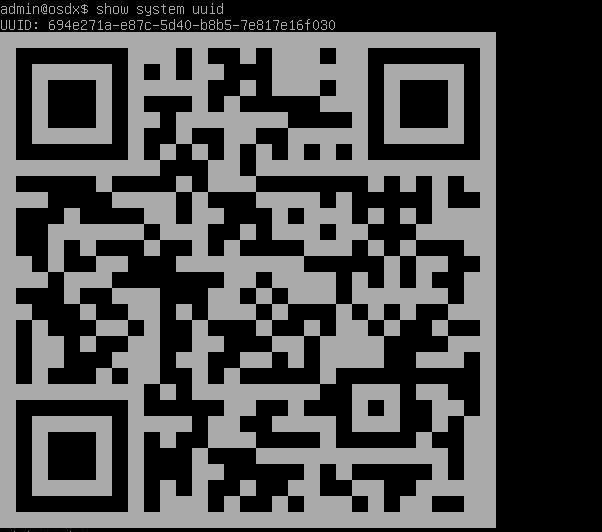
OSDx UUID example